‘Soto cannot escape the Triceraton tractor beam, and thus our heroes are captured by the nefarious warrior race. The saurian leader recognizes Honeycutt and commands him to build a transmat device under threat of killing Gizmo and Fluffy if he refuses. The Fugitoid reluctantly agrees.
Months pass as Honeycutt works on the machine. The Triceraton mothership has returned to their homeworld while Gizmo and Fluffy have been locked up in a prison cell and forced to work as janitors. As the guys swab the deck and lament their situation, they try to think of a way to get weapons that will allow them to find the Fugitoid and bust out. As they clean, Gizmo accidentally discovers that one of the floor cleaners can launch bars of soap with deadly velocity. Thus Fluffy and Giz head back to the store room and begin modifying the cleaning equipment until they have an armored vehicle and a full arsenal of assault weapons. The duo jump onboard their “tank” and zoom down the corridors of the Tricertaon ship, “cleaning up” the guards who “bar” their way (sorry – couldn’t help it :)
Gizmo and Fluffy find Professor Honeycutt at work, who explains to them that he needs 30 minutes to finish his machine. This news shocks the mercenaries, but they trust their robotic friend and set off to distract the Triceratons while the Fugitoid finishes his plan. Gizmo and Fluffy find a real aresenal and grab some mighty big guns while Fugitoid works. Unfortunately, the gun Gizmo grabbed is too powerful, and its recoil blows him through a wall, allowing the Triceratons to capture the mercenaries. As the Triceratons lead Giz and Fluffy back to their cell, Honeycutt finishes his machine. The professor has tapped into the Triceraton mothership’s computer and used its power to create a gigantic version of his Menta-Wave Helmet, which he uses to send a message throughout the galaxy – a suicide note that explains that due to the violent nature of both the Federats and the Triceratons, he has been forced to overload and destroy his robot body so that the transmat design will die with him. The machine could have improved life for everyone, but because the warring nations desired it for evil, it had to be destroyed. After delivering his message, the Fugitoid’s body is zapped with high energy and the man-bot falls to the floor – just as Gizmo and Fluffy walk by. Giz rushes to his fallen firend’s side – but he’s gone.
After verifying that the robot is indeed dead, the Triceratons allow Gizmo and Fluffy to leave and take the body with them. The duo take the dead ‘bot to a nearby planet and lie the body against a tree, positioned as they had found it. Gizmo gets out his notebook computer and tries to write a eulogy – but the device has a memory error that can only be fixed by plugging it into a “Class C Memory Unit”. As it turns out, the Fugitoid robot contains such a unit… and while Gizmo feels ghoulish using his dead friend as a means to fix his laptop, Fluffy convinces his buddy to do it, as Honeycutt wouldn’t have minded. Reluctantly, Giz plugs his notebook into the prone robot and, sure enough, once the info is downloaded into the ‘bot, the Fugitoid comes back to life. Honeycutt explains that he used the giant Menta-Wave device to transfer his intellect into Gizmo’s laptop, hoping that circumstance would work out and he could be revived. Fluffy pats the professor on the back and asks what he’ll do now that he’s free (since everyone thinks he’s dead). As Honeycutt ponders this turn of events, two Utroms teleport in. The Fugitoid had also called on their assistance when he delivered his message, and they explain it was easy to track his coordinates. Professor Honeycutt leaves with the brainy aliens and Fluffy and Giz head out to seek more adventures.
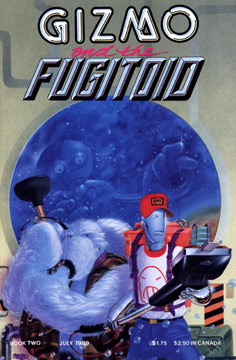
COVER: Michael Dooney
Writers: Peter Laird and Michael Dooney
Penciler: Michael Dooney
Inker: Michael Dooney
Letters: Steve Lavigne
First Printing: July, 1989


